• Skip to primary navigation
  • Skip to main content
  • Skip to primary sidebar
  • Home
  • All Recipes
    • RECIPES BY CATEGORY
    • RECIPES BY DIET
    • RECIPES BY INGREDIENT
  • HOW-TO
  • PANTRY
  • Contact

Cooking with Nart logo

menu icon
go to homepage
  • RECIPES
  • PANTRY
  • HOW-TO
  • CONTACT
  • SUBSCRIBE
    • Facebook
    • Instagram
    • Pinterest
    • TikTok
    • YouTube
  • subscribe
    search icon
    Homepage link
    • RECIPES
    • PANTRY
    • HOW-TO
    • CONTACT
    • SUBSCRIBE
    • Facebook
    • Instagram
    • Pinterest
    • TikTok
    • YouTube
  • ×
    Home » Pantry » Herbs & Spices

    Published: Mar 17, 2019 · Modified: Jun 12, 2020 by Nart · This post may contain affiliate links.

    How To Dry Your Homegrown Herbs

    homegrown dried oregano, parsley, tarragon in small bowls

    It's been a while since I wrote a post about my plants and today is the day because I've just done something really exciting for the first time.

    That's drying my own herbs! Yeah, when you're approaching the big 3-0, it's the things like this that excite you. 😂😂

    homegrown oregano, parsley, tarragon

    As I saw my herbs going a little crazy early last week, I realized it was about time to prune them. This time, I actually planned ahead what to do with the cuttings. I LOVE using dried herbs in my cooking so I thought I'd dry them. Within the next few minutes I found myself shopping for a drying rack online.

    After looking for some time, I finally ordered one that was made for drying dad deaw (sun-dried) meat. This is not the flat basket you see in the picture below and sorry I didn't take a picture of the rack I bought. I promise I will next time but basically my drying rack is the ugliest drying rack EVER. It's huge, it's blue, it's doesn't look cool at all. But it does the job. 😉

    homegrown dried oregano, parsley, tarragon

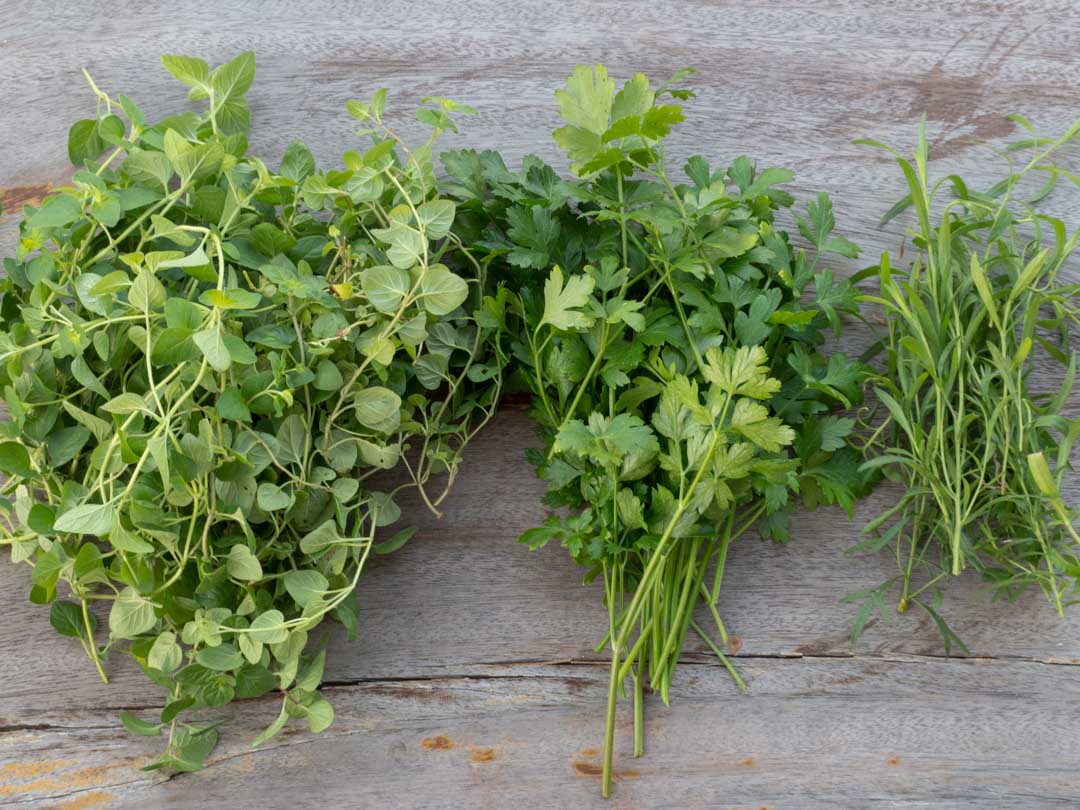
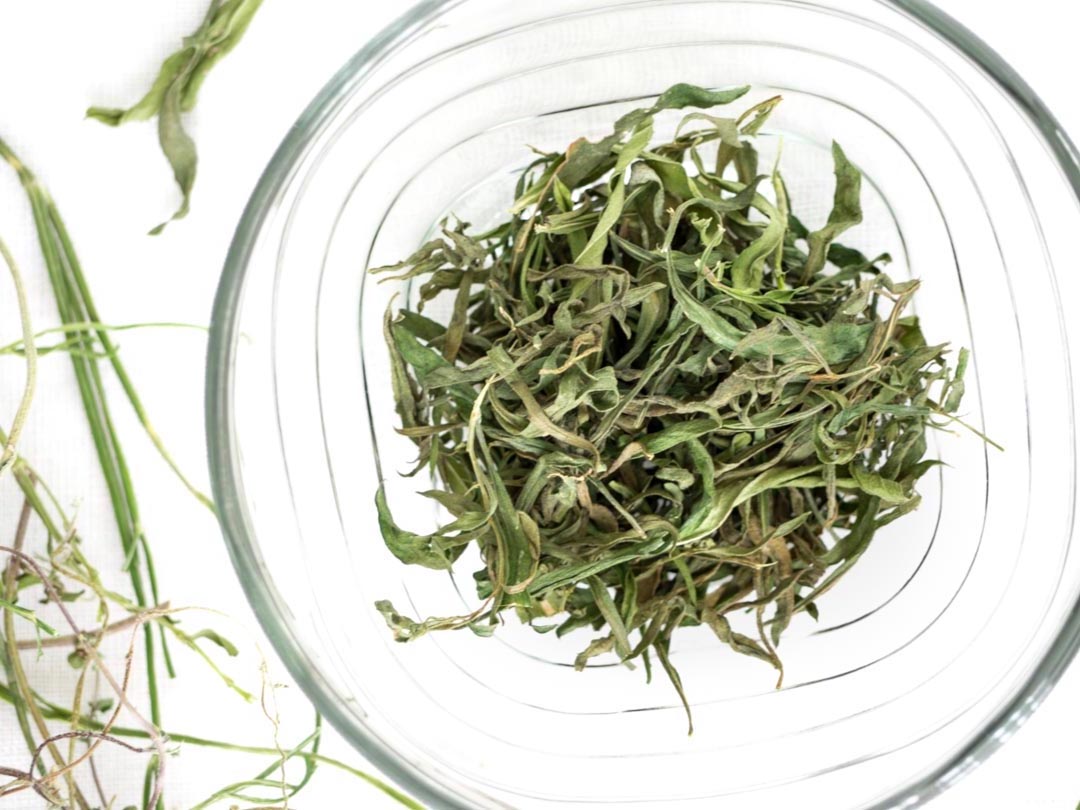
    Anyway, I got the rack on the next day so I cut the herbs the morning after. This time I did oregano, parsley and tarragon. After I got the cuttings, I rinsed them under running water, placed them in the rack, and hung the rack out in the sun, on a clothes drying rack to be precise!

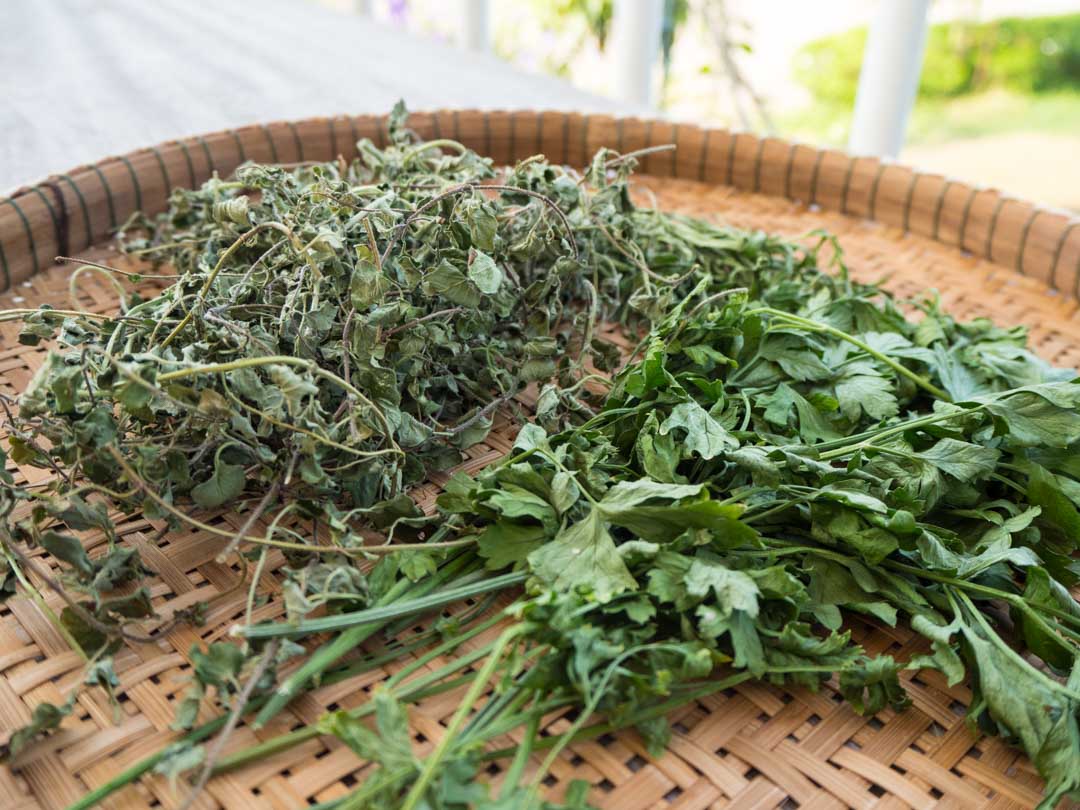
    Because the sun is very strong here in Thailand, I thought one day would be enough for the leaves to dry. But I was wrong. At the end of Day 1, I checked the herbs and it looked like they needed more time to dry. So I left the rack outside for another day.

    homegrown dried oregano

    At the end of the Day 2, the herbs started to look right. I tore some to smell before sorting them out inside the house and I found that they weren't as fragrant as I had expected. To be honest I was a bit disappointed so I went online to find out what went wrong.

    And I found that some websites suggested the sun is naturally too strong for drying herbs. Like, it would take away much of their fragrances. They recommended drying them in an oven or food dehydrator. At that point, I thought, Really? Never mind, I'll try the oven option next time.

    homegrown dried parsley

    Then I left the herbs in the rack somewhere in the kitchen, thinking the quality wouldn't be good enough. About five days later, I wanted to put away the rack so I was like, hmmm, maybe I'll grind them and see what happens. 

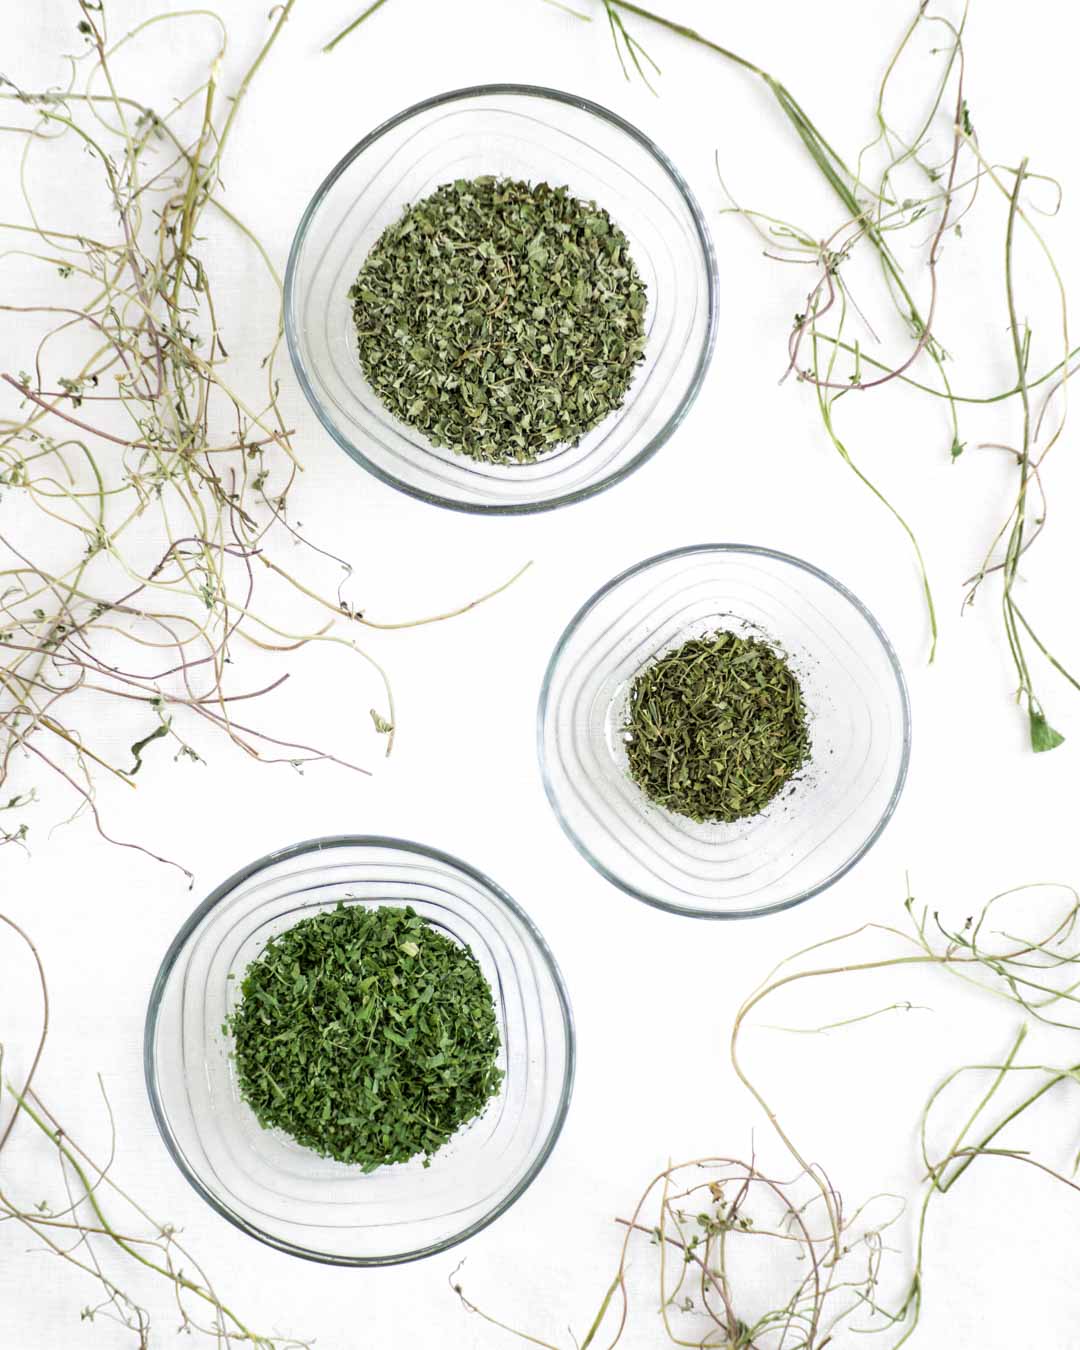
    So I removed the leaves from the stems and and grind each herb separately in my mini blender. And guess what, the moment I opened the first batch, I was so surprised that the smell of the herb was so strong. This was also true for the other two herbs. It was amazing! I was so glad I didn't decide to throw away the herbs. They were super awesome and definitely usable. So yeah, if you grow herbs and love using dried herbs, I highly recommend you dry them yourself! You'll be surprised at how satisfying this is!

    homegrown dried tarragon

    How To Dry Your Homegrown Herbs

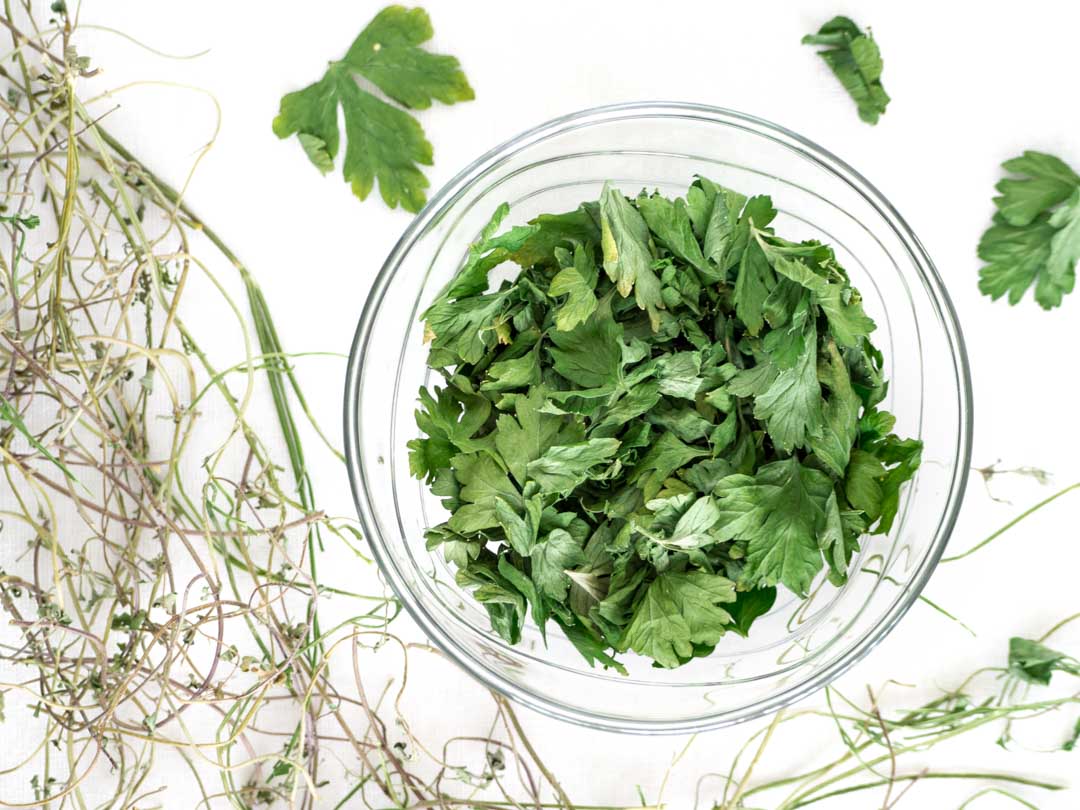
    1. Cut the herbs and rinse under running water.

    2. Dry the herbs in a drying rack either inside or outside for 1-2 days or until dried.

    3. Remove the leaves of the dried herbs from the stems.

    4. Discard the stems and grind the leaves in a blender.

    5. Store the ground herbs in airtight containers.

    Please don't forget to pin me! 🙂

    All images & content are copyright protected. Please do not use my images without prior permission. 


    « Vegan Laab with Konjac Noodles
    Curry Fried Quinoa with Mussels »

    Newsletter

    Never Miss a Recipe!

    Sign up and receive the latest recipes via email

    Reader Interactions

    Comments

      Leave a Reply Cancel reply

      Your email address will not be published. Required fields are marked *

      Recipe Rating


    1. Beth says

      June 20, 2020 at 10:59 am

      I appreciate your comments on the drying process. In my Honolulu yard I have rosemary, basil, mint and cilantro ready to dry. It's too humid here to expect them to dry in the kitchen, but my new air fryer is supposed to work as a dehydrator, so I'm looking forward to giving that a try.

      Reply
      • Nart says

        June 24, 2020 at 1:14 pm

        Thanks for sharing your method Beth. I've got an air-fryer and I'm going to try that too!

        Reply
    2. Juliasdailytips says

      August 22, 2019 at 7:56 pm

      This is such a good info, thanks for sharing. Giving it a try soonest.

      Reply
    3. Nyxie says

      July 17, 2019 at 7:49 pm

      I personally used to do this all the time in my old home. I had string tied up from one end of the kitchen to the other (and it was a small house) and various herbs hung upside down along them and left there to dry for a period of time. My mum often puts flowers into the hotpress to dry them out for putting in between pages etc.

      Great guide 🙂 You've reminded me that i need to get back into the practice of herb drying.

      Reply
      • nart says

        July 22, 2019 at 5:53 pm

        That's awesome! I should try doing it in the kitchen too. Thanks so much for sharing! <3

        Reply

    Primary Sidebar

    Hi, I'm Nart!

    I'm Thai born and bred. I love cooking Thai for my family, friends, and myself. I'm here to share with you my delicious and easy Thai recipes. More about me →

    CONNECT WITH ME!

    • Facebook
    • Instagram
    • Pinterest
    • YouTube

    SEASONAL RECIPES

    • Thai laab moo in a white dish
      Laab Moo | Thai Isan-Style Ground Pork Salad | ลาบหมู
    • Thai marian plum salad in a bowl
      Thai Marian Plum Salad | Yum Mayongchid | ยำมะยงชิด
    • daikon soup in a white bowl
      Daikon Soup with Pork Ribs (Thai Style) | ต้มจืดหัวไชเท้า
    • a stack of Thai steamed pumpkin cake ขนมฟักทอง
      Thai Steamed Pumpkin Cake | Khanom Fak Thong | ขนมฟักทอง

    POPULAR RECIPES

    • Thai mango sticky rice dessert with pandan leaves on a black plate
      Thai Mango Sticky Rice
    • three bottles of butterfly pea lemonade
      Butterfly Pea Tea Lemonade
    • nam jim jaew Thai spicy dipping sauce in a turquoise bowl
      Thai Chili Dipping Sauce | Nam Jim Jaew | น้ำจิ้มแจ่ว
    • a pile of grilled pork neck
      Thai Grilled Pork Neck (Kor Moo Yang)
    • Thai omelette or kai jeow on top of rice
      Thai Omelette (Kai Jeow)
    • goong ob woonsen on chppsticks
      Thai Shrimp and Glass Noodles | Goong Ob Woonsen
    • two glasses of butterfly pea latte on a white surface
      Butterfly Pea Milk | Butterfly Pea Latte | นมสดอัญชัน
    • a bowl of cabbage stir-fry
      Easy Cabbage Stir Fry
    • thai spicy and sour salad dressing in a mortar
      Thai Salad Dressing | Spicy Dipping Sauce | น้ำยำ | น้ำจิ้มซีฟู้ด
    • crispy Thai pork toast served with cucumber relish
      Thai Pork Toasts | Khanom Pang Na Moo | ขนมปังหน้าหมู
    Amazon Disclosure

    As an Amazon Associate, I earn from qualifying purchases.

    Footer

    ↑ back to top

    About

    • Disclosure and Privacy Policy
    • Accessibility Statement
    • Contact

    Follow

    • Facebook
    • Instagram
    • Pinterest
    • YouTube

    BROWSE

    • Recipes
    • Pantry
    • How-to Guides

    COPYRIGHT © 2025 COOKINGWITHNART.COM ALL RIGHTS RESERVED

    • Facebook
    • Twitter
    • Pinterest